If you need to know how to enable Secure Boot, the process usually comes down to three things: confirming your PC supports UEFI, opening the firmware settings, and turning Secure Boot on in the boot or security menu.
Often the toughest task is not the task of setting the whole thing up at all but rather its pre-conditions – going from legacy BIOS to UEFI and default keys. Secure Boot is a firmware security functionality, designed to protect you by preventing any unsigned or modified boot software from loading up prior to the OS, the OS itself, being launched. Microsoft points out it’s also part of its Windows 11 on supported PC system requirements, and its support sites also have guides showing you how to configure the system’s firmware should Secure Boot not currently be active.
What Secure Boot Does
What Secure Boot Does Secure Boot is intended to secure the boot process by enabling only known, good boot components to run. That’s important because some types of malware – ones that target the system before Windows even starts loading – can be even harder to catch and remove than standard software-level infections. More concretely, Secure Boot is about preventing a compromise that could manipulate the initial steps the PC takes before Windows takes over, particularly in modern PCs that tend to employ UEFI (rather than legacy BIOS) firmware. Navigating these hardware changes is a vital part of managing your personal tech galaxcys afely.
If you are upgrading your operating system to meet the official Windows 11 system requirements, fixing a problem with a security feature, or setting up a computer for more restricted use, turning this feature on in your firmware is an essential first step.
Before You Change Anything
Before you learn how to enable Secure Boot, check a few basics first. Secure Boot only works properly on systems using UEFI firmware, so if your PC is still set to Legacy mode or CSM is enabled, you may need to change that first.
Also, if your drive has been encrypted with either BitLocker or Device Encryption, changes to firmware settings could result in the system prompt asking you to recover your drive or provide your recovery key upon reboot. Support from ASUS makes clear that BIOS changes could require the BitLocker key.
Step 1: Confirm Whether Secure Boot Is Already Enabled
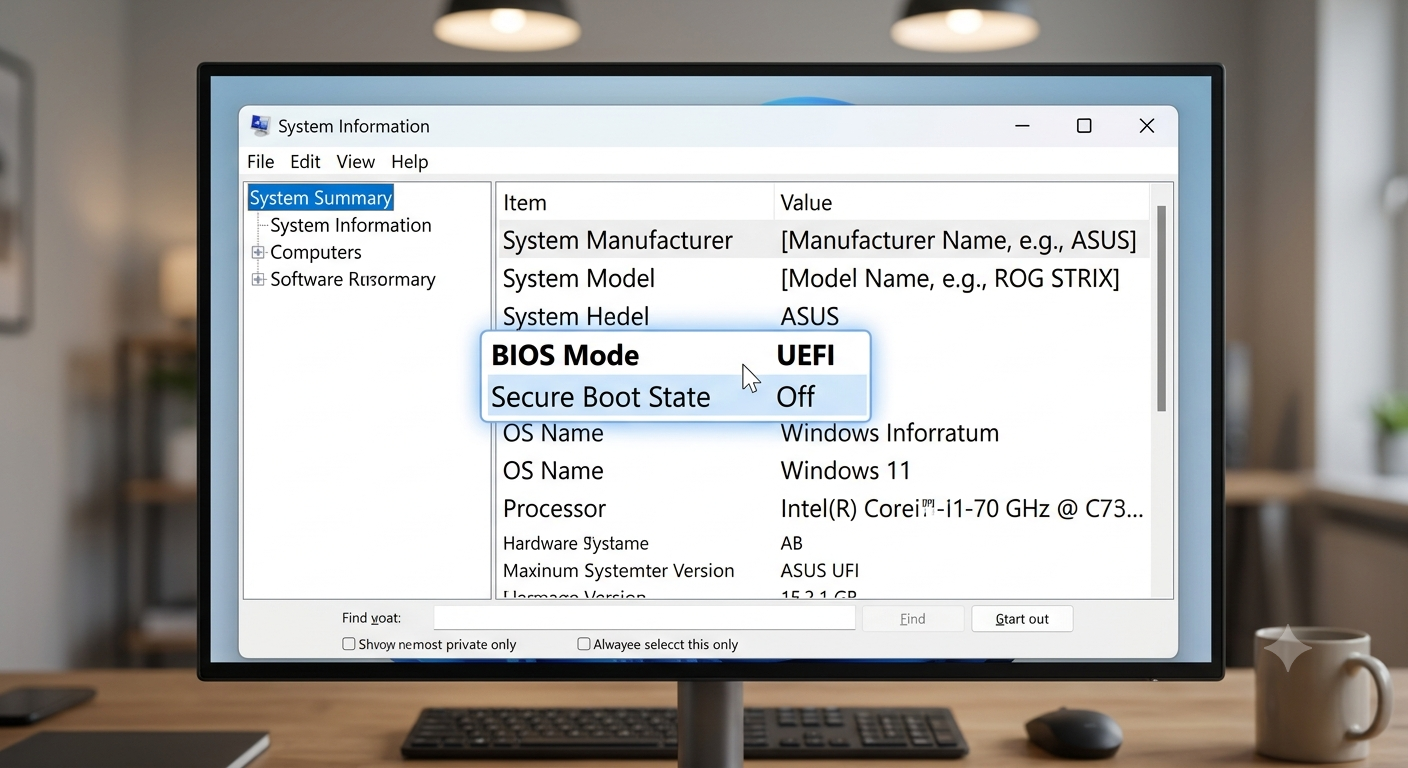
Check Your Settings In Windows Most of the time, all that you need to do is check your system information. Press the Windows key and begin typing System Information. When you open it, find “Secure Boot State” under system summary.
If it shows “On”, you’re good to go. If it is “Off” or “Unsupported” go on to the next step. You can also determine if your system uses UEFI or Legacy BIOS. If your system is in Legacy mode, Secure Boot might not be enabled until you modify the boot mode.
Step 2: Open UEFI or BIOS Setup
There are two common ways to reach firmware settings.
Method 1: From Windows
Use Windows Recovery or Advanced Startup, then choose the option for UEFI firmware settings. Microsoft and Windows support guides describe this path as the cleanest way to enter firmware on many systems.
Method 2: During Startup
Restart the computer, then repeatedly tap the manufacturer’s setup key as soon as the logo appears. Depending on the device, this is often Delete, F2, Esc, or one of the function keys.
If you are not sure which key to press, watch for a startup message or consult your PC or motherboard documentation.
Step 3: Switch to UEFI If Needed
This step seems to be what confuses most people. Secure Boot needs to be enabled, which will more than likely force your computer into UEFI mode and might make CSM (or Legacy mode) need to be turned off prior. You’ll notice this information will also be prevalent on other support sites dedicated to motherboards, as well as on Microsoft’s support page; since Secure Boot relies on UEFI.
In the firmware menu, look for settings such as:
- Boot Mode.
- UEFI/Legacy.
- CSM.
- Compatibility Support Module.
If Legacy or CSM is enabled, change the system to UEFI mode and disable CSM if your PC allows it. Save the change, but do not panic if the machine restarts back into firmware—some systems need one extra reboot before the Secure Boot option becomes available.
Step 4: Find the Secure Boot Setting
Once inside the firmware interface, look under Boot, Security, or sometimes Authentication.The setting may be named differently by brand, but Secure Boot is usually listed in one of those menus.
The setting may appear as:
- Secure Boot.
- Secure Boot Control.
- Secure Boot State.
- Secure Boot Mode.
Select the setting and change it to Enabled. On some systems, you may also need to choose a mode such as Standard or Default.
Step 5: Restore or Install Default Keys If Prompted
Some firmware will not allow Secure Boot to turn on until default keys are installed. If you see an option such as Restore Factory Keys, Install Default Keys, or Load Secure Boot Keys, choose the default or factory key option unless you have a specific reason to manage custom keys.
This is normal. Secure Boot relies on trusted keys, and many systems ship with those keys available but not activated until you confirm the setup.
Step 6: Save and Restart
After enabling Secure Boot, save your changes and exit firmware. The PC will restart normally if everything is configured correctly.
If the system fails to boot, returns to firmware, or asks for a recovery key, don’t keep changing random settings. Recheck whether UEFI is active, whether CSM is disabled, and whether your boot drive is formatted in a way the firmware recognizes.If BitLocker appears, you’ll need to enter the recovery key when prompted
Secure Boot Setup Checklist
| Step | What to Do | Why It Matters |
| 1 | Check whether BIOS mode is UEFI | Secure Boot usually requires UEFI firmware |
| 2 | Back up important files | Firmware changes can affect boot behavior |
| 3 | Save your BitLocker recovery key | BIOS changes may trigger recovery prompts |
| 4 | Open firmware settings | This is where Secure Boot is enabled |
| 5 | Disable Legacy/CSM mode if needed | Secure Boot often won’t work in Legacy mode |
| 6 | Enable Secure Boot | Turns on boot-level protection |
| 7 | Restore default keys if prompted | Many systems need trusted keys loaded first |
| 8 | Save and restart | Applies the firmware changes |
| 9 | Confirm in Windows | Verify Secure Boot State shows On |
BIOS Mode vs. Secure Boot
| Setting | What It Means | Secure Boot Compatible? |
| Legacy BIOS | Older boot mode used by many traditional systems | Usually no |
| UEFI | Modern firmware standard for newer PCs | Yes |
| CSM Enabled | Compatibility mode that mimics older BIOS behavior | Often no |
| CSM Disabled | Helps the system use full UEFI features | Usually yes |
Common Problems and Fixes
| Problem | Likely Cause | Best Fix |
| Problem | Likely Cause | Best Fix |
| Secure Boot option is missing | PC is in Legacy mode or CSM is enabled | Switch to UEFI and disable CSM |
| Secure Boot is greyed out | Default keys are not installed | Load or restore factory keys |
| PC won’t boot after enabling it | Boot configuration doesn’t match UEFI mode | Recheck boot settings and UEFI boot entry |
| BitLocker recovery appears | Firmware change triggered protection | Enter the recovery key |
| Secure Boot still shows Off in Windows | Setting wasn’t saved or prerequisites weren’t met | Re-enter firmware and verify settings |
Where to Find Secure Boot
| Firmware Menu | What to Look For |
| Boot | Secure Boot, Boot Mode, CSM |
| Security | Secure Boot Control, platform keys |
| Authentication | Secure Boot status or key management |
| Advanced | Boot-related compatibility settings on some boards |
Verification Table
| Check | Expected Result |
| Windows System Information | BIOS Mode = UEFI |
| Windows System Information | Secure Boot State = On |
| Firmware setup | Secure Boot enabled |
| Firmware setup | CSM/Legacy disabled if required |
When to Use Secure Boot
| Situation | Why It Helps |
| Installing or upgrading to Windows 11 | Helps meet Microsoft’s security requirements |
| Securing a personal PC | Reduces boot-level tampering |
| Setting up a work device | Common requirement in managed environments |
| Using modern UEFI hardware | Makes full use of the platform’s security features |
How to Confirm It Worked
After Windows loads, confirm the change in System Information. The Secure Boot State should show On, and BIOS Mode should show UEFI.
If you want an additional check, many Windows support guides suggest using built-in tools or the system summary view to verify that the feature is active. If the state still shows Off, it usually means one of the firmware prerequisites was missed.
Common Problems and Fixes
Secure Boot Is Greyed Out
This usually means one of three things: the system is still in Legacy mode, CSM is enabled, or the platform keys have not been installed yet. Switching to UEFI and loading default keys fixes many of these cases.
Windows Won’t Boot After the Change
That can happen if the drive format or boot configuration does not match the new firmware mode. If you changed from Legacy to UEFI and the PC stops booting properly, return to firmware and check whether the system needs a proper UEFI boot entry.
BitLocker Recovery Appears
This is expected on some encrypted systems after a firmware change. ASUS support specifically warns that BIOS changes can trigger a BitLocker prompt, so keep the recovery key handy before making changes.
I Can’t Find the Secure Boot Option
Firmware layouts differ by manufacturer and model. Check Boot, Security, or Authentication menus, and remember that the option may not appear until the system is set to UEFI and CSM is disabled.
Best Practices
If you are learning how to enable Secure Boot for the first time, a few habits make the process safer:
- Back up important files first.
- Save your BitLocker recovery key.
- Note your current firmware settings before changing anything.
- Change only one or two settings at a time.
- Verify BIOS mode after restarting.
These steps are especially important on systems that are older, customized, or already encrypted.
When Secure Boot Matters Most
Secure Boot is most useful when you care about boot-level protection and compatibility with modern Windows requirements. It is especially relevant when:
- Upgrading or installing Windows 11.
- Hardening a work or personal PC against boot-time tampering.
- Using a modern UEFI-based system that already supports the feature.
- Preparing a device for environments with stricter security policies.
Conclusion
The easiest way to remember how to enable Secure Boot is this: To verify your PC is running UEFI, go to Firmware Settings, disable Legacy or CSM (Compatibility Support Module), if it was set, and make sure Secure Boot is Enabled. If you’re asked, just choose ‘load default keys’. Once you have everything set up in firmware, go to the settings and confirm the feature reports as ‘On’. It’s a little option with a big impact on security – especially when using Windows 11 or other newer systems. With the right preparation, and your recovery key at the ready, it’s a relatively painless step.
Common Queries About Secure Boot in simple terms
1. What is Secure Boot in simple terms?
Secure Boot Secure boot is a firmware security feature to prevent malicious and un-trusted code to be executed before operating system boots.
2. Do I need Secure Boot for Windows 11?
Secure Boot is the norm for Windows 11 PCs, and Microsoft even gives some instructions for what to do when your system has Secure Boot but it isn’t enabled.
3. Why can’t I turn on Secure Boot?
The most common reasons are Legacy boot mode, CSM being enabled, or missing default firmware keys.
4. Will enabling Secure Boot delete my files?
There should be no files deletion. Firmware changes, if not done appropriately on the drive or boot mode, will force it to require BitLocker recovery mode.
5. Where do I find Secure Boot settings?
Usually in the Boot, Security, or Authentication section of UEFI setup.
6. How do I know Secure Boot is on after I change it?
Click Check system information in Windows. Verify the Secure boot State value and it should be On. Note down the BIOS Mode. It should be UEFI.